Almost everyone has a memory of someone doing the splits — a gymnast, a dancer, maybe a kid in your third-grade class who just dropped into them like it was nothing. And almost everyone has thought: I could never do that.
Here’s the thing: you probably can. Not today, maybe not in a month, but with consistent work, most people can get a lot closer to the splits than they think.
The biggest fears I hear from beginners? “I’m too old.” “I’m too stiff.” “I’ll pull something.” These are all real concerns, and I’m not going to brush them off.
Flexibility does take longer for some people than others. Your starting point matters. So does your age, your activity history, and how often you actually practice.
But here’s what I’ve seen working with clients over the years: flexibility is trainable at almost any age. Your muscles aren’t permanently short. They just haven’t been asked to lengthen regularly, progressively, and with good technique.
This guide is built for people who are starting from zero. You’ll learn what the splits actually are, which muscles need the most attention, how to warm up safely, and eight stretches that build toward your first full split.
How to Do the Splits?
There’s also a weekly practice schedule, a list of the most common mistakes beginners make, and honest answers to questions like “how long is this actually going to take?”
Let’s get into it.
What Are the Splits?
The splits are a position where your legs extend in opposite directions until your hips drop fully to the floor. That’s the simple version. The more useful version is understanding there are two kinds — and they’re pretty different.
- Front splits (also called the forward split) have one leg reaching straight in front of you and the other extending directly behind. Your hips face forward. This position primarily challenges your hip flexors, hamstrings, and the front of your back thigh.
- Side splits (also called the middle split, straddle, or box split) have both legs extending outward to each side. Your hips open sideways, and you lower down between your legs. This one demands a lot more hip and groin flexibility — the inner thighs and adductors do most of the work.
For most beginners, the front split is easier to approach first. Your body already moves in a forward/backward direction when you walk, lunge, or climb stairs, so the movement pattern is somewhat familiar. The side split requires a range of motion in directions most people rarely use.
That said, some people — particularly dancers or those who’ve played sports requiring lateral movement — find the side split more natural. It depends on your body and your history. Start with whichever feels more accessible, but work on both if your goal is overall flexibility.
Benefits of Learning the Splits
People often think of the splits as a party trick or a competition move. It’s actually a genuinely useful flexibility goal, and the training to get there has benefits that show up in everyday life.
- Improved flexibility and range of motion. The stretching required to reach the splits — hip flexors, hamstrings, groin, inner thighs — addresses the areas most people are tight in from sitting all day. A better range of motion in these areas means less stiffness in general.
- Reduced muscle tension. Tight hips and hamstrings pull on the lower back. A lot of people with chronic low-back discomfort notice real relief when they start working through a consistent Flexibility Training for Beginners routine.
- Better posture. Tight hip flexors tilt your pelvis forward, which creates an exaggerated arch in the lower back. Stretching them regularly brings your pelvis into better alignment, which naturally improves how you stand and sit.
- Athletic performance. Whether you run, cycle, play tennis, or lift weights, hip mobility affects how efficiently you move. Runners with more flexible hips waste less energy. Lifters with open hips squat deeper. The crossover is real.
- Increased body awareness. Learning the splits teaches you to feel the difference between productive discomfort and actual pain. That’s a useful skill — it makes you a better mover in everything you do.
- A genuine sense of progress. Unlike a lot of fitness goals, flexibility gives you visible, measurable feedback. Seeing yourself get half an inch closer to the floor every few weeks is genuinely motivating.
Before You Start: Warm Up First
This might be the most important section in the whole guide, so stay with me.
Stretching cold muscles is one of the fastest ways to get hurt. Muscles behave differently when they’re warm — they’re more pliable, more elastic, and more willing to lengthen.
Cold muscles are stiffer, and when you force a stiff muscle to stretch hard and fast, you risk micro-tears and that deep, achy soreness that keeps you off the mat for a week.
A proper warm-up raises your body temperature, gets blood flowing to the muscles you’re about to stretch, and loosens up the connective tissue around your joints. Think of it like warming up clay before you try to shape it.
What works best before a splits session? Dynamic movement — not static holding. Jump rope for five minutes.
Walk or jog lightly. Do leg swings (front to back, then side to side), hip circles, and a few bodyweight squats.
March your knees up toward your chest for a minute or two. All of this gets your legs moving through their range without forcing them into positions they’re not ready for yet.
Your Warm Up Exercises routine should run at least 8–10 minutes before you start stretching in earnest.
If you’re jumping in right after work when you’ve been sitting all day, bump that to 12–15 minutes. Cold and stiff needs more time.
One more thing: do your splits practice after a workout, not before.
Your muscles are already warm, your body is ready to move, and your flexibility gains tend to stick better when your nervous system is already activated. Stretching at the end of a workout also helps with recovery.
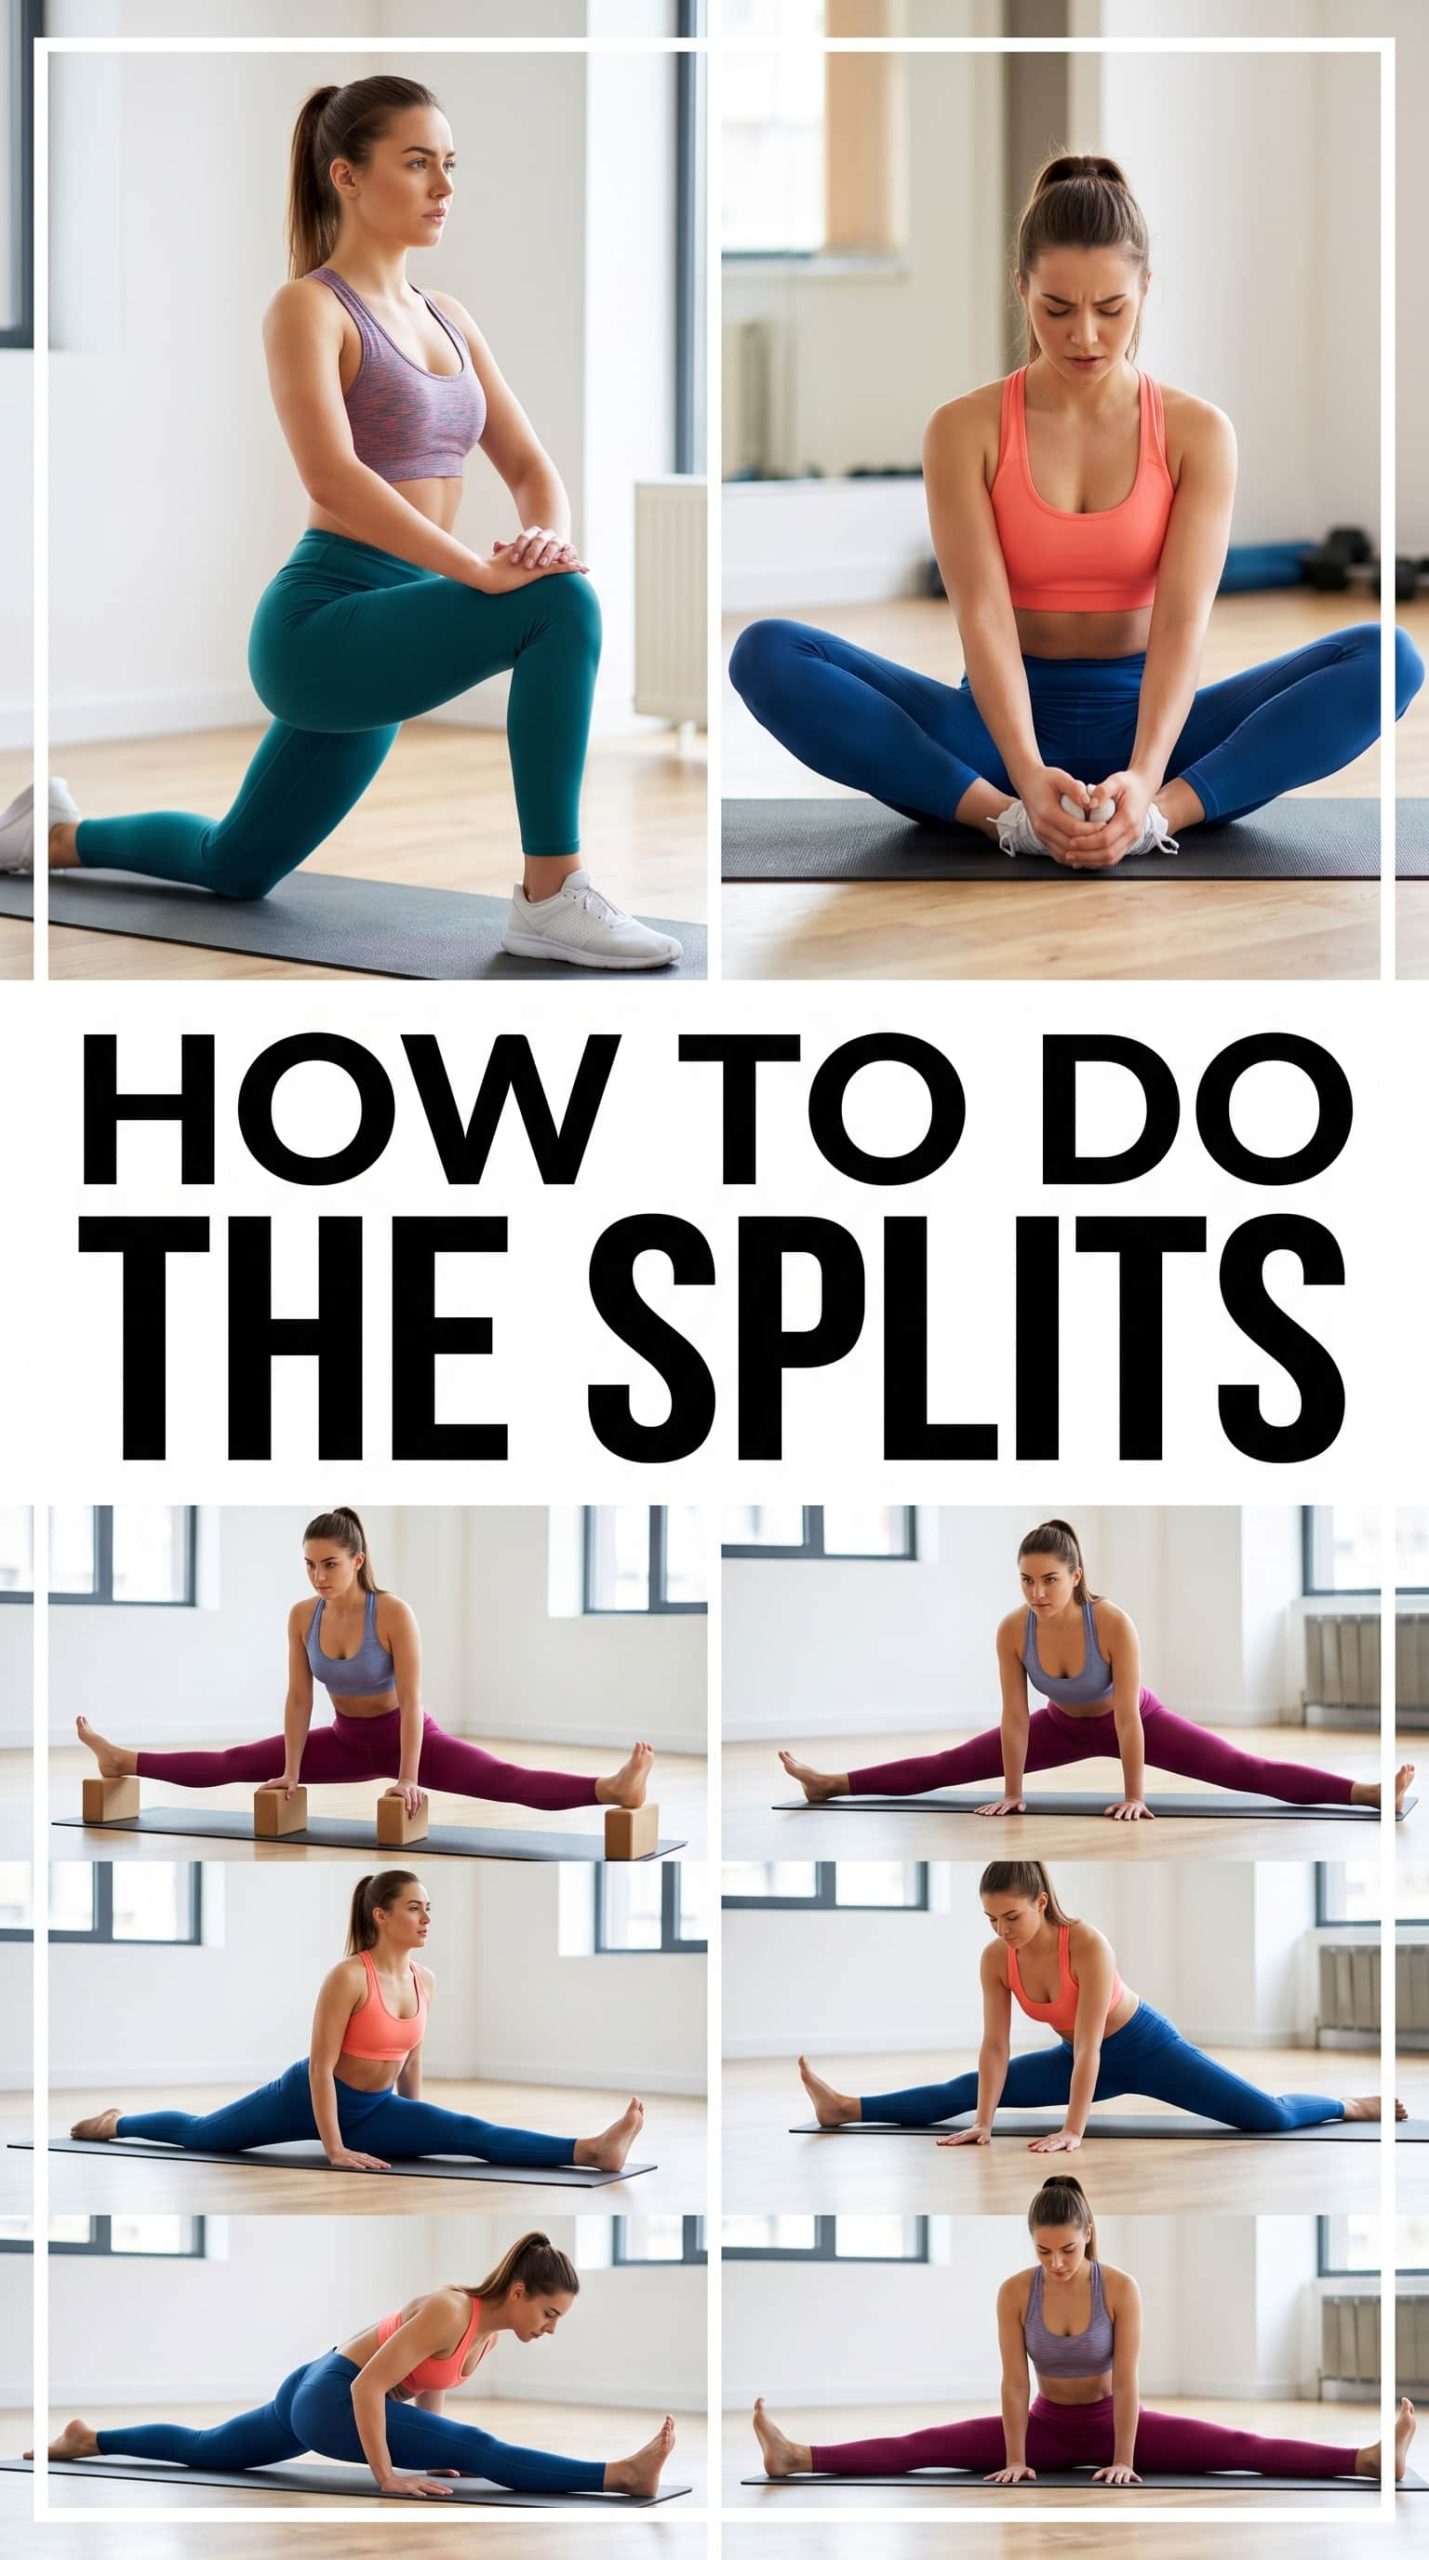
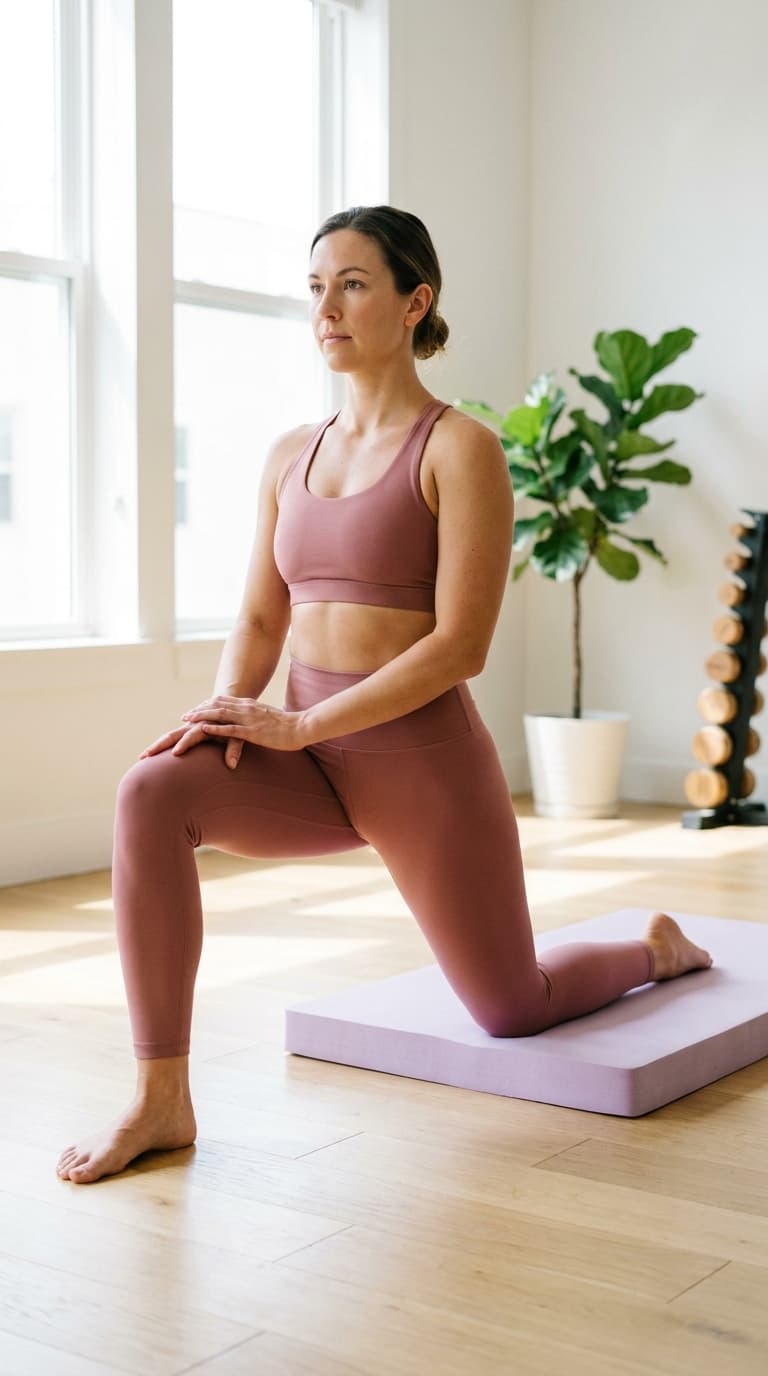
Step 1: Stretch Your Hip Flexors
How to Perform It?
Start in a low lunge: step your right foot forward so your right knee is stacked directly over your right ankle.
Lower your left knee to the floor — use a folded towel or yoga mat under it if the ground is hard. Your back leg extends behind you, the top of the foot resting on the floor.
From here, stand tall through your spine. Don’t round forward or let your front knee cave inward.
Gently press your hips forward and down — you’re looking for a stretch in the front of your left hip and thigh.
Hold for 30–45 seconds, breathing steadily. Exhale as you press your hips slightly deeper. Switch sides and repeat.
Common mistake: letting the front knee travel way past the toes, which puts pressure on the knee rather than opening the hip. Keep that shin as vertical as you can.
Why This Stretch Helps?
Tight hip flexors are the primary obstacle to front splits. The hip flexor group runs from the lower back and hip to the front of the thigh — when it’s short, your pelvis can’t tip back far enough to drop into the split position.
Beginner Tip:
If the floor bothers your back knee, fold up a yoga mat or grab a small pillow. There’s no prize for kneeling on hardwood. Make yourself comfortable so you can actually focus on the stretch.
Step 2: Improve Hamstring Flexibility
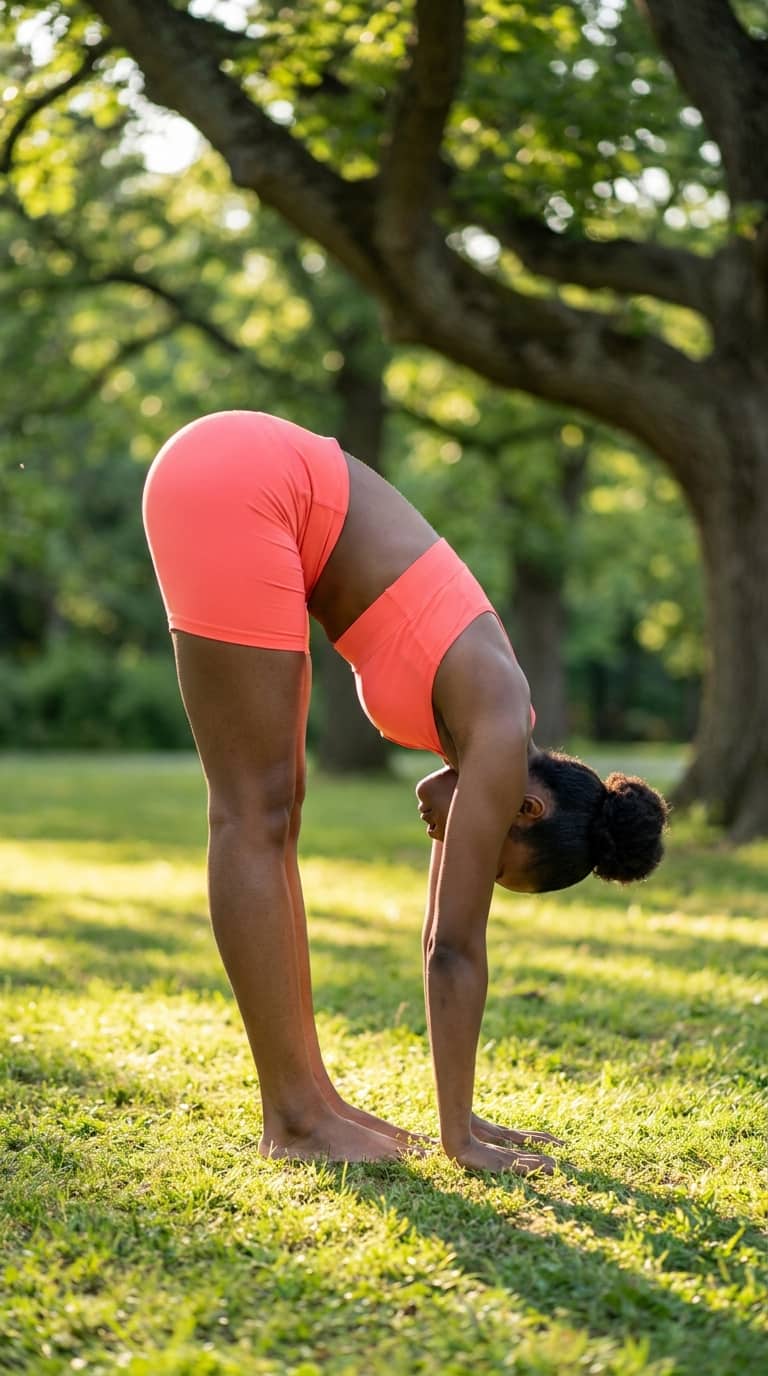
How to Perform It?
Stand with your feet hip-width apart. Hinge at your hips — not your waist — and fold forward, letting your hands reach toward the floor. Keep a soft bend in your knees if your hamstrings are very tight. As they loosen over time, they gradually work toward straighter legs.
Hold the position for 45–60 seconds. Focus on the sensation in the back of your thighs, not on whether your hands touch the ground. Breathe deeply and let gravity do part of the work on each exhale.
You can also try this seated: sit on the floor with both legs extended in front of you, flex your feet, and reach forward toward your toes. Both versions work.
Common mistake: rounding the lower back aggressively to get the hands lower. This takes the stretch away from the hamstrings and dumps it into your spine. Hinge from the hips first.
Why This Stretch Helps?
The hamstrings attach at the base of your pelvis and run down the back of each thigh. In the front split, the front leg’s hamstrings need significant length. If they’re tight, the whole position feels locked before you’re even halfway down.
Beginner Tip:
If a forward fold feels impossible with straight legs, bend your knees generously at first. You’ll still get a hamstring stretch — just higher up, near the hip attachment. As weeks go on, start straightening them a little more each session.
Step 3: Practice the Butterfly Stretch

How to Perform It?
Sit on the floor and bring the soles of your feet together, letting your knees fall outward naturally. Hold your feet or ankles with both hands. Sit tall through your lower back first — don’t just collapse forward.
Once you feel stable, hinge forward from your hips (the same motion as the hamstring stretch). Let your chest lower toward your feet. You’ll feel this in your inner thighs and groin.
Hold for 45–60 seconds. Press your knees gently downward if you want more intensity — use your elbows against your inner thighs, not your hands, forcing your knees down.
Common mistake: hunching the upper back dramatically to get your head lower. The stretch should come from your hip hinge, not your spine bending.
Why This Stretch Helps?
The butterfly targets the adductors — your inner thigh muscles — which are heavily involved in the side split and also contribute to how freely your hips open in the front split.
Beginners often neglect the inner thighs because they don’t feel as tight as the hamstrings, but they’re just as important.
Beginner Tip:
If your knees hover way up off the floor and the stretch feels intense immediately, sit on a folded blanket. Elevating your hips slightly relaxes the pelvis and makes the position much more accessible.
Step 4: Open Your Hips With Pigeon Pose

How to Perform It?
Start in a tabletop position on hands and knees. Slide your right knee forward toward your right wrist, angling your right shin across the mat.
Your right foot comes toward your left hip. Extend your left leg straight back behind you, resting the top of your foot on the floor.
Lower your hips toward the mat. For most beginners, the right hip won’t reach the floor — place a folded blanket or block under that hip for support. Don’t let your hips tilt sideways.
From here, you can stay upright (more hip stretch) or fold forward over your front shin (deeper stretch into the hip and glute). Hold 45–60 seconds. Breathe into the sensation.
Common mistake: collapsing your front ankle. Try to keep your foot slightly flexed to protect the knee joint.
Why This Stretch Helps?
Pigeon targets the piriformis and external hip rotators — the deep muscles that control how freely your hip moves in and out of rotation.
These muscles affect both split types, and they’re notoriously stubborn. Regular pigeon work opens up a range of motion that nothing else quite reaches.
Beginner Tip:
Tight hips can make the first few weeks of pigeon very uncomfortable. Stick with the prop under your hip, breathe slowly, and give it time. Most people notice meaningful change in hip openness within 3–4 weeks of consistent practice.
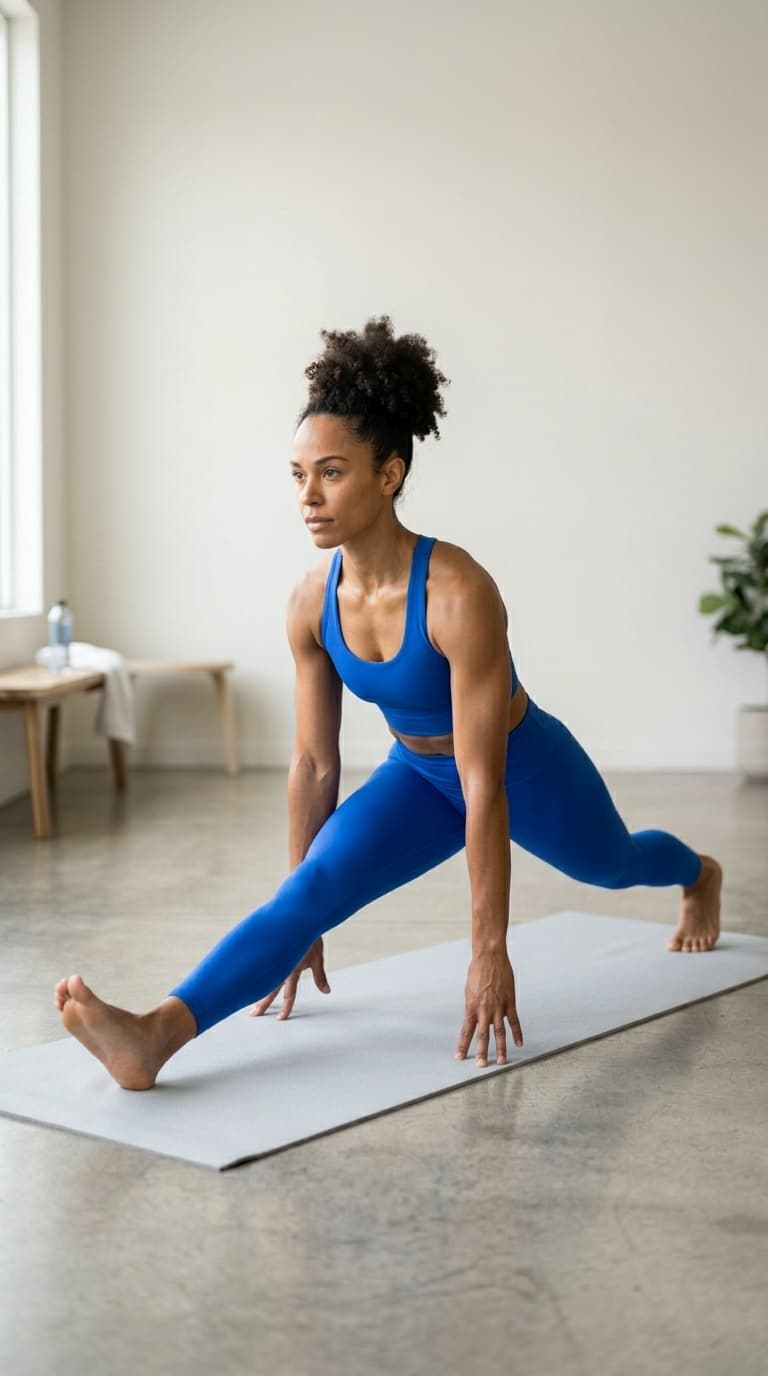
Step 5: Master the Half Split Stretch
How to Perform It?
Start in a low lunge with your right foot forward. From here, shift your hips back and straighten your front leg, heel on the floor, foot flexed toward the ceiling. Your back knee stays on the mat.
Rest your hands on either side of your front leg for balance. Keep your hips square — resist the urge to let them open sideways. Your lower back should stay long, not rounded.
You’ll feel a deep pull through the back of your front thigh (hamstring) and possibly into the back of your calf. Hold 30–45 seconds, breathing slowly. Switch sides.
Common mistake: rounding aggressively through the spine to try to touch the front foot. Let the stretch live in your thigh, not your lower back.
Why This Stretch Helps?
The half split is essentially a guided rehearsal for the front split position. It trains the hamstrings at a longer length than a standing forward fold, and it teaches your hips to stay square — both skills you need when you eventually work toward the full position.
Beginner Tip
Use yoga blocks on either side of your front leg if your hands don’t comfortably reach the floor. This lets you stay tall through your torso instead of collapsing sideways.
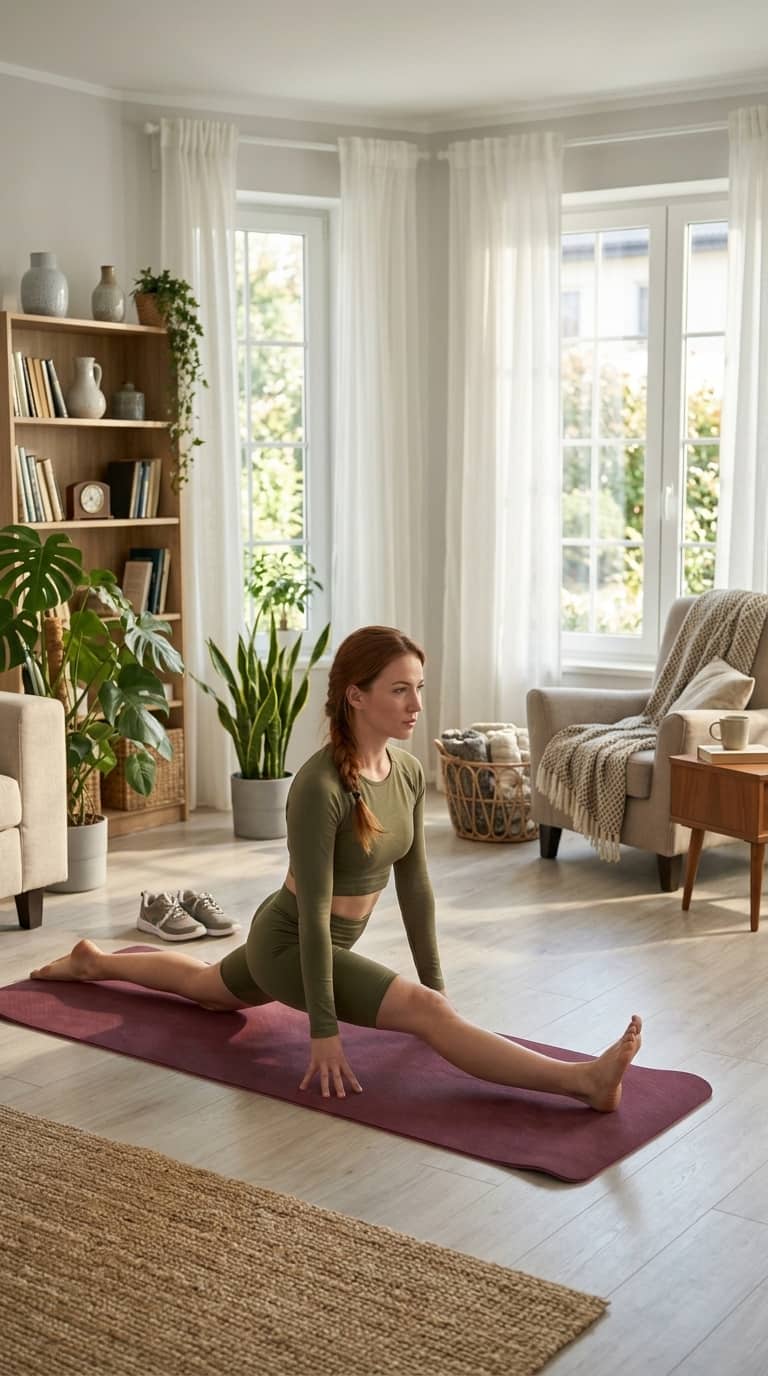
Step 6: Try the Lizard Stretch
How to Perform It?
Start in a low lunge with your left foot forward. Step your left foot out to the outside of your left hand — so your foot is wider than hip-width. Lower both forearms to the mat inside your front foot if your flexibility allows; if not, stay on your hands.
Your back leg extends behind you, knee either on or hovering off the mat (knee down is a gentler version). Keep your chest open rather than collapsing toward your front leg.
Hold 30–45 seconds. You’ll feel this deeply in the front of your back hip and into the inner thigh of your front leg. Switch sides.
Common mistake: letting the front knee cave inward. It should track over your second or third toe throughout.
Why This Stretch Helps?
Lizard goes after both hip flexors and hip rotators simultaneously, plus the adductors of the front leg. It covers a lot of ground for one stretch, which is why it’s a staple in Hip Flexor Stretches sequences targeted at split work.
Beginner Tip
If forearms-to-the-floor is way too much right now, keep both palms on the mat and focus on keeping the front knee tracking over your foot. You’ll still get the stretch.
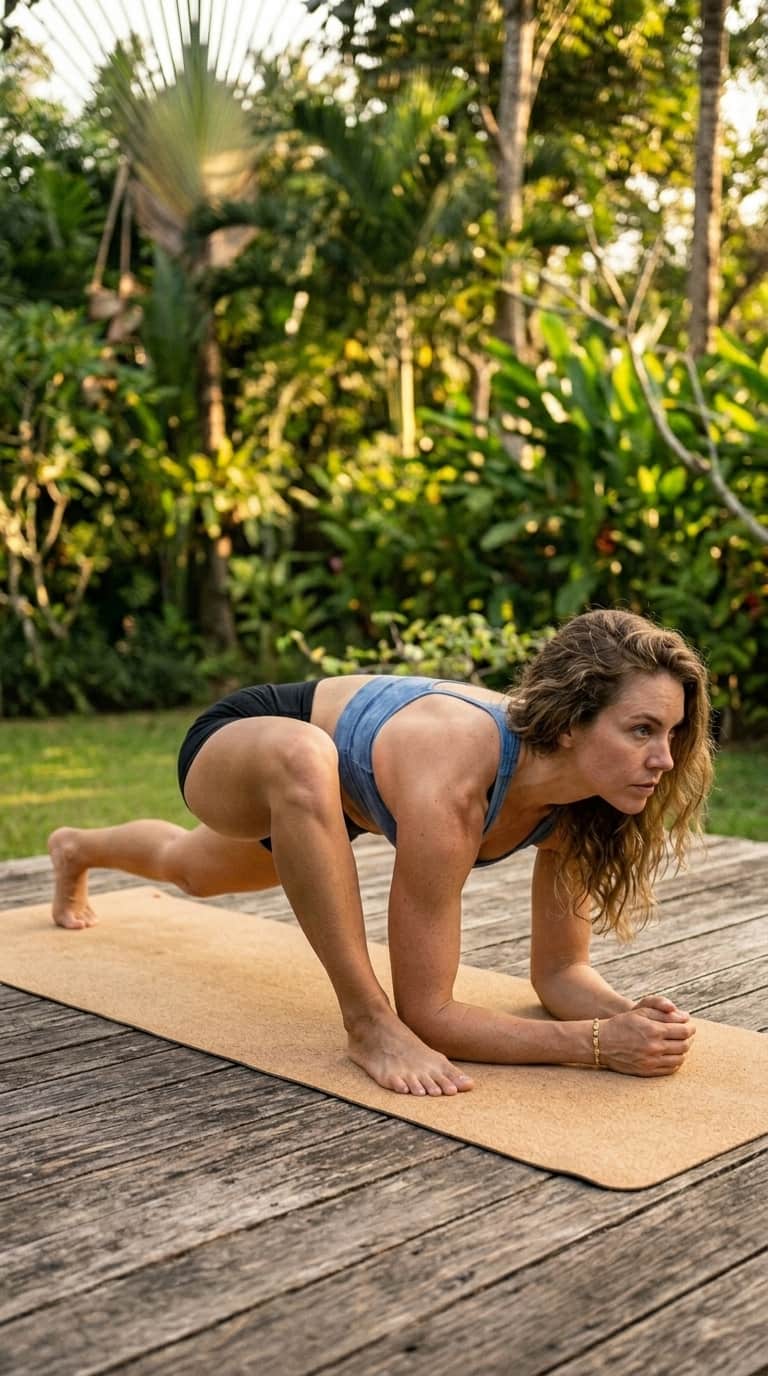
Step 7: Begin Front Split Progressions
How to Perform It?
After warming up thoroughly with the stretches above, start working toward the actual front split position. Begin in a low lunge (right leg forward). Slowly slide your front foot forward while your back knee slides backward, keeping both legs close to the floor.
Lower your hips toward the mat gradually. Don’t force them down — let gravity do the work over time. Use your hands on the floor beside your hips for support and control. Stop wherever your body naturally stops without pain.
Hold your deepest, most comfortable position for 30–60 seconds. Over weeks of practice, you’ll notice your hips dropping closer to the floor. Switch sides and work the left leg forward as well.
Common mistake: dropping too fast or bouncing. Slow and controlled is the only way forward here.
Why This Stretch Helps?
All the individual stretches you’ve been doing — hip flexors, hamstrings, pigeon, half split — prepare the pieces. Front split progressions put those pieces together and train the movement pattern as a whole. This is where the Flexibility Exercises you’ve been building actually start to look like the goal.
Beginner Tip
Place a folded blanket or a yoga block under your front thigh to reduce how far you need to lower your hips. This makes the progression more manageable without cheating your form.
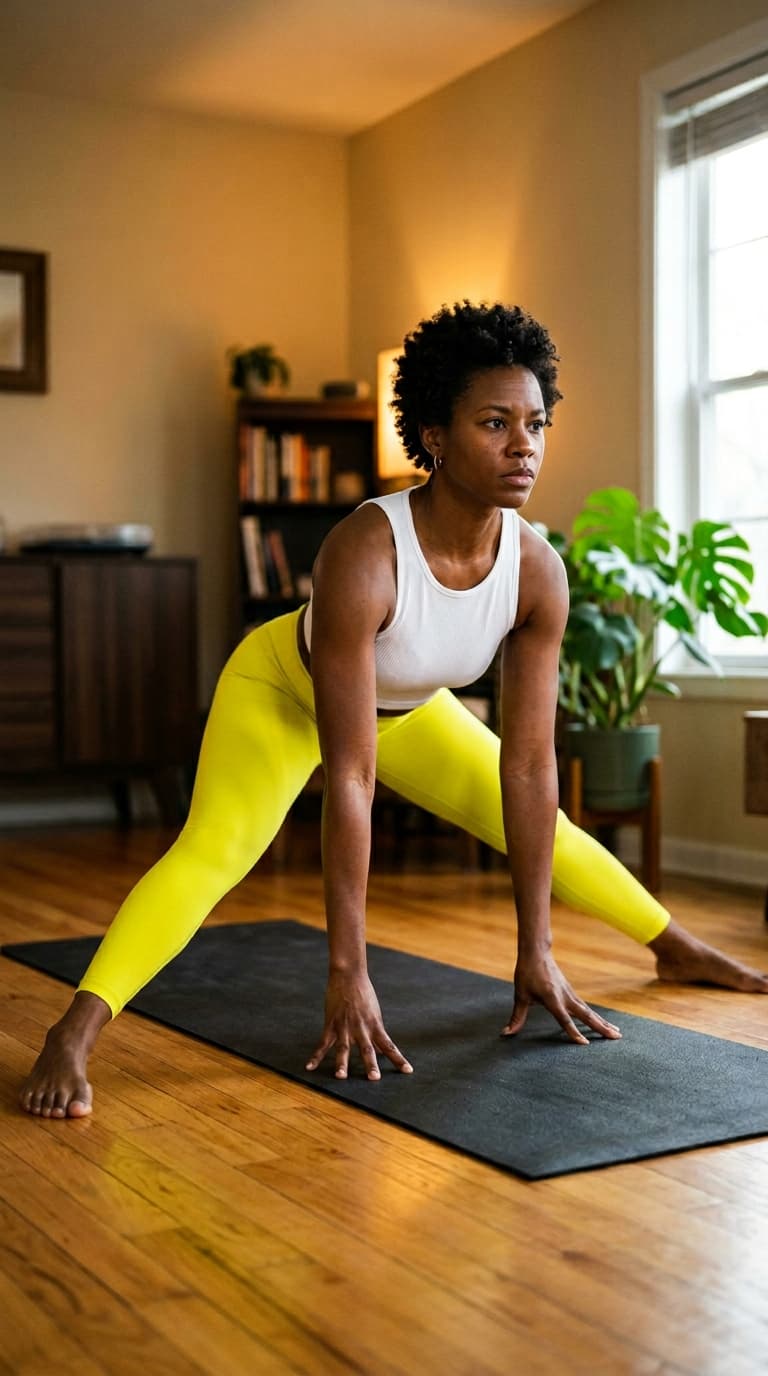
Step 8: Practice Side Split Progressions
How to Perform It?
Stand with your feet wider than shoulder-width. Slowly walk your feet outward — sliding on socks on a hardwood floor works well, or simply take wider and wider stances over time. Keep your toes pointing up toward the ceiling rather than forward.
Lower your hips toward the floor by bending your knees slightly and then straightening your legs as you descend. Place your hands flat on the floor in front of you for support. Hold your lowest comfortable point for 30–60 seconds.
The inner thighs (adductors) will do most of the work here. You might feel it all the way up into the groin. That’s normal — just keep breathing and don’t force a deeper position than you can control.
Common mistake: letting your toes rotate forward. That external rotation takes the stretch out of the inner thighs and puts it on the wrong structures. Keep those feet flexed and toes pointing up.
Why This Stretch Helps?
The side split requires more hip and adductor flexibility than most people have developed. These progressions train the specific range of motion you need while also building the strength to control the position, which matters just as much as the flexibility itself.
Beginner Tip
Side splits typically take longer than front splits for most beginners. Don’t compare your progress between the two. Keep consistent with your Lower Body Mobility work, and the side split will come — it just moves at its own pace.
Common Mistakes When Learning the Splits
Learning the splits is straightforward in theory, but surprisingly easy to mess up in practice. Here are the mistakes I see most often — and how to fix them.
- Skipping the warm-up. This is the big one. People run out of time, feel impatient, or figure they’ll just stretch gently at first. But there’s no such thing as “stretching gently” into a cold muscle. It either doesn’t do much or causes a strain. The warm-up isn’t optional padding — it’s what makes the stretching actually work. If you’re short on time, shorten the stretching session, not the warm-up.
- Pushing through pain. There’s a real difference between the productive discomfort of a good stretch and the sharp, stabbing, or burning sensation that means something is wrong. Productive stretch discomfort is dull, broad, and often described as a “pulling” feeling. Pain that’s sharp, very localized, or that makes you wince is your body telling you to back off. Beginners sometimes confuse the two because they think flexibility work is supposed to hurt. It shouldn’t. Discomfort, yes. Pain, no.
- Inconsistent practice. Stretching hard twice a week and skipping the other five days doesn’t build flexibility well. Muscles respond better to frequent, moderate stimulation than to occasional intense sessions. Aim for at least 4–5 days a week, even if some sessions are shorter. A 15-minute session four days a week will outperform a 60-minute session once a week, pretty much every time.
- Poor alignment. Hips falling sideways in the front split, feet rotating in the side split, collapsing into a rounded back during a hamstring stretch — these are all ways of creating the appearance of progress without actually improving flexibility. If your hips aren’t square in the front split, you’re not really building the range of motion you need. Slow down and prioritize form over depth.
- Holding your breath. It sounds simple, but a lot of beginners grip and hold their breath when they hit a tough stretch. This creates muscular tension throughout the whole body, which is the opposite of what you want. Breathe slowly and deliberately. Exhale into the deepest point of each stretch. It genuinely helps your muscles release.
- Comparing yourself to others. Flexibility is wildly individual. Your hip socket anatomy, your tendon lengths, your activity history — all of these are different from the person next to you. Some people will hit the splits in eight weeks. Others will need eight months. Both timelines are completely valid. Comparing your week three to someone else’s year one is a reliable way to feel discouraged for no reason.
How Long Does It Take to Learn the Splits?
Honestly? There’s no single answer, and anyone who gives you a specific timeline is guessing.
That said, here’s what actually affects how long it takes.
- Your starting flexibility. If you played soccer, danced, or did gymnastics as a kid, your hips might remember more range than you think. If you’ve spent the last decade at a desk with minimal movement, you’re starting further back. Neither is a problem — they’re just different starting points.
- Your age. Connective tissue does become less elastic with age, and flexibility gains generally come more slowly after your 30s than they did in your teens. That doesn’t mean adults can’t learn the splits — I’ve worked with people in their 40s and 50s who got there — but the timeline is often longer, and recovery between sessions matters more.
- How often do you practice. Frequency is the biggest lever you control. Practicing 5–6 days a week versus 2 days a week is genuinely not comparable in terms of progress speed.
- Your recovery habits. Flexibility training creates small amounts of muscle stress, just like strength training. Sleep, hydration, and rest days affect how well your body adapts. People who stretch like crazy but sleep five hours a night and are chronically dehydrated tend to progress slowly.
- Bone structure. This one’s real and often overlooked. Hip socket depth and angle vary from person to person, and some people will simply never achieve a fully flat split, no matter how flexible they are. This is anatomy, not failure. A “near split” with excellent form is a legitimate goal.
For most consistent beginners, some measurable progress shows up in 4–8 weeks. Getting close to a full front split typically takes 3–6 months of regular practice. The side split usually takes longer — 6 months to a year or more is completely normal.
Weekly Splits Practice Schedule
This schedule is designed for beginners who are building toward their first split. Adjust the duration based on your current availability.
| Day | Focus Area | Duration |
|---|---|---|
| Monday | Hip flexors + hamstrings | 20–25 min |
| Tuesday | Active recovery (light walking, gentle movement) | 10–15 min |
| Wednesday | Full stretching sequence (all 8 steps) | 30–35 min |
| Thursday | Butterfly + pigeon + lizard | 20–25 min |
| Friday | Front split progressions + half split | 25–30 min |
| Saturday | Full stretching sequence + side split progressions | 35–40 min |
| Sunday | Rest or very gentle movement | Optional |
A few notes on using this: Wednesday and Saturday are your longer sessions, where you run through the full sequence.
The shorter weekday sessions keep the muscles adapting without requiring a big time commitment every day.
Rest or very light movement on Tuesday and Sunday gives your body time to actually recover.
If life gets in the way and you miss a day, don’t try to double up the next day. Just pick up where you left off.
Safety Tips for Beginners
Flexibility training is generally low-risk, but “low-risk” and “no-risk” aren’t the same thing. Here’s how to keep your practice smart.
- Learn to tell discomfort from pain. A genuine stretch feeling is broad and dull — it’s distributed across a muscle belly. Pain that’s sharp, shooting, localized to a joint, or that appears suddenly is a signal to stop. Don’t try to breathe through actual pain.
- Progress gradually. The goal is to go slightly deeper than last session, not dramatically deeper. Aggressive progress tends to create setbacks. If you stretch to the point of real pain, the muscle will tighten protectively, and you’ll often lose ground rather than gain it.
- Give yourself rest days. Muscles need time to adapt after flexibility training. Two consecutive days of intense stretching followed by a rest day is better than stretching hard seven days in a row. Your body builds flexibility during recovery, not just during the session itself.
- Drink enough water. Dehydrated muscles are stiffer and more injury-prone. It sounds basic, but hydration consistently affects how a stretching session feels. If you feel unusually stiff one day, consider whether you’ve had enough water.
- Work within your own range. Trying to match a pose you saw in a video — especially if the person demonstrating is an advanced practitioner — often leads to people forcing positions they’re not ready for. Work within your actual current range, not the range you think you should have.
- Stop if something doesn’t feel right. Soreness 24–48 hours after a stretching session is normal. Persistent sharp pain, joint discomfort, or swelling is not. If something feels genuinely off, take a few days off and see how it resolves before returning to training.
FAQs
- Can anyone learn the splits?
Most people can significantly improve their split progress with consistent training, but “anyone can do the splits” isn’t quite accurate. Bone structure — specifically your hip socket depth and angle — does affect how far your legs can separate. Some people have anatomy that won’t allow a full flat split no matter how flexible they are. That said, most people who feel “too stiff” simply haven’t trained consistently. Before you assume anatomy is the limiting factor, give yourself 3–4 months of regular practice and see what changes.
- How often should I stretch to see progress?
Four to five days a week is a good target for beginners. Daily stretching is fine if your sessions aren’t extremely intense, but most people benefit from at least one or two rest or recovery days per week. The frequency matters more than the duration of any single session. Twenty minutes, five days a week, will generally produce better results than a 90-minute session once on Sunday.
- Is it harder to learn the splits after 30?
A bit harder, yes — but not impossible. Connective tissue becomes less elastic as you age, and your nervous system may be slightly more protective about new ranges of motion. Adults also tend to spend more time sitting, which creates chronic tightness that takes longer to unwind. That said, plenty of adults in their 30s, 40s, and even 50s have achieved their splits with patient, consistent training. Expect the timeline to be longer than it would be for a teenager, and invest more attention in your warm-up and recovery.
- Should stretching hurt?
No. Stretching should produce a sensation of tension or mild discomfort in the muscle being stretched — not pain. If you feel sharp, burning, or shooting sensations, or pain in a joint rather than in a muscle belly, that’s a signal to ease out of the position. A lot of beginners push through real pain because they think flexibility work is supposed to be intense. Productive stretching feels like significant tension. It does not feel like something is being torn.
- Can I practice every day?
You can, with a caveat. Daily practice is fine if you vary the intensity — some days doing a full deep session, other days doing lighter maintenance stretching. Doing your hardest session every single day without any lighter days tends to slow progress and can lead to overuse soreness. Think of it like strength training: not every session can be a max effort.
- Which split is easier to learn?
For most beginners, the front split is more accessible than the side split. The front split primarily requires hamstring and hip flexor flexibility — muscles that most people use and have some baseline flexibility in. The side split requires inner thigh (adductor) flexibility, which most adults have very little of, plus a different kind of hip rotation that’s less commonly trained. Start with the front split and work on side split progressions alongside it.
- What muscles need to be flexible to do the splits?
For the front split: primarily the hip flexors (front of the back leg’s hip), the hamstrings (back of the front leg’s thigh), and the quadriceps. The inner thigh on the back leg also needs some flexibility. For the side split: the adductors (inner thighs of both legs) and hip external rotators are the primary focus. Both split types benefit from general hip mobility and a flexible lower back. A comprehensive At Home Workout Routine that includes Mobility Exercises covering all of these areas will make your split progress faster.
- What’s the biggest mistake beginners make?
Skipping the warm-up and then being inconsistent with their practice schedule — and those two things tend to happen together. People do a couple of sessions, feel too stiff or get some soreness, and conclude that they’re “not flexible people.” The soreness from the early sessions is normal and temporary. If you warm up properly and practice consistently for 6–8 weeks before evaluating your progress, most people are genuinely surprised by how much they’ve improved.
Conclusion:
The splits feel like a big goal, and honestly, they should.
It takes real commitment — not just a few stretching sessions, but weeks and months of consistent work.
That’s not a discouraging truth; it’s actually useful information. It means there’s no trick to miss, no shortcut you’re overlooking.
Just consistent practice, smart warm-ups, and enough patience to let your body adapt at its own pace.
What I’ve seen again and again is that people who stop measuring progress week by week and start measuring it month by month make the most progress.
Flexibility shifts slowly, then it shifts noticeably — and the people who stick around for the noticeably part are the ones who make it there.
Save this guide. Come back to the stretching steps as a reference. Follow the weekly schedule even when you don’t feel like it, especially on the days you don’t feel like it.
You don’t have to be naturally flexible. You just have to keep showing up.
